Wednesday, February 4, 2015

Tangles on Pewter and a Rooster stencil

Sorry for the delay in posting this. The last quarter of 2014 was quite hectic and I just finished working on all the samples for my classes of  2015.
I have enjoyed working on different Metal Embossing projects incorporating the use of  tangles. The  combined use of  pewter, stencils and tangles is absolutely amazing.
I was asked to post a tutorial with  the steps of a project I did on pewter using a Rooster Dreamweaver Stencil and Zentangle (*). The final project was this wooden box:


This is the list of materials I used:
 
Mercart's:
Pewter roll . I cut a piece of 5" x 7"
Basic kit with 4 tools: Teflon tool, Star Wheel. Cup and Ball and Refiner
Fiber Glass tool
Others:
Wooden box
Decoart black acrylic paint
Brush
Silver polishing paste
Soft cloth
Acrylic
 
Instructions:

 
step 1
1) Place the stencil on the pewter,  turn it and place it over the hard non-textured  working surface (glass or acrylic).
 
step 2
2)Rub the metal  against the stencil with the tip of the Paper stump until you clearly see the stencil  design.
step 3
3) Outline the entire stencil design with the Teflon tip to give it a clean look.


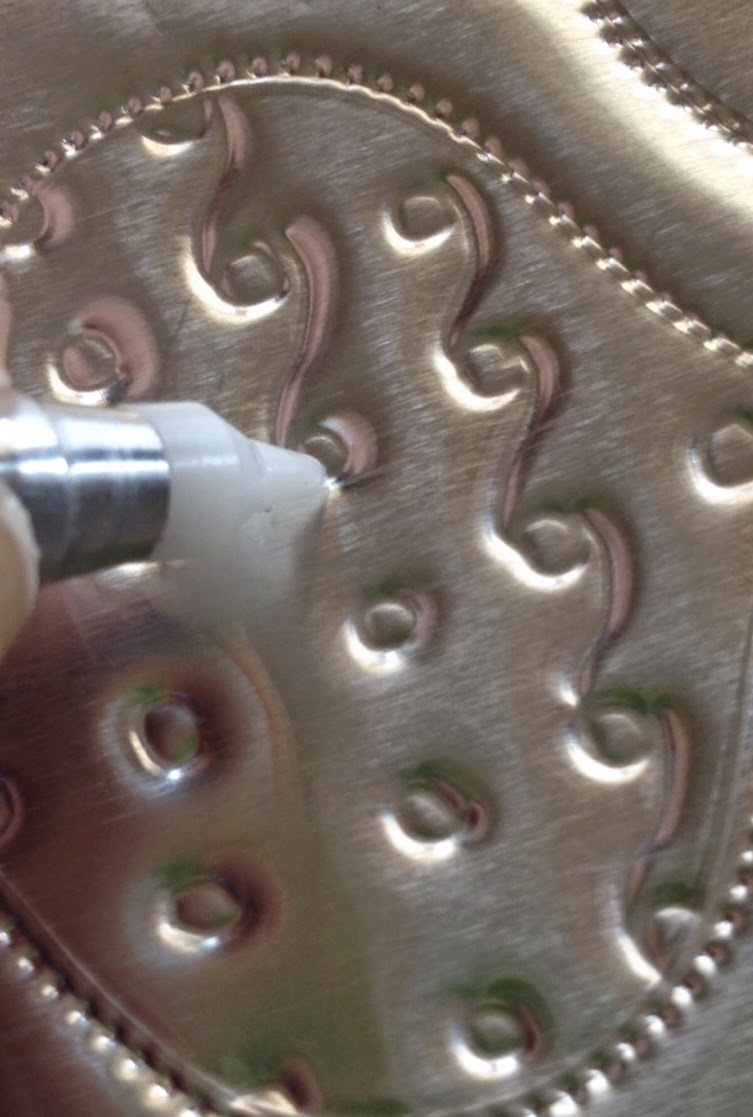
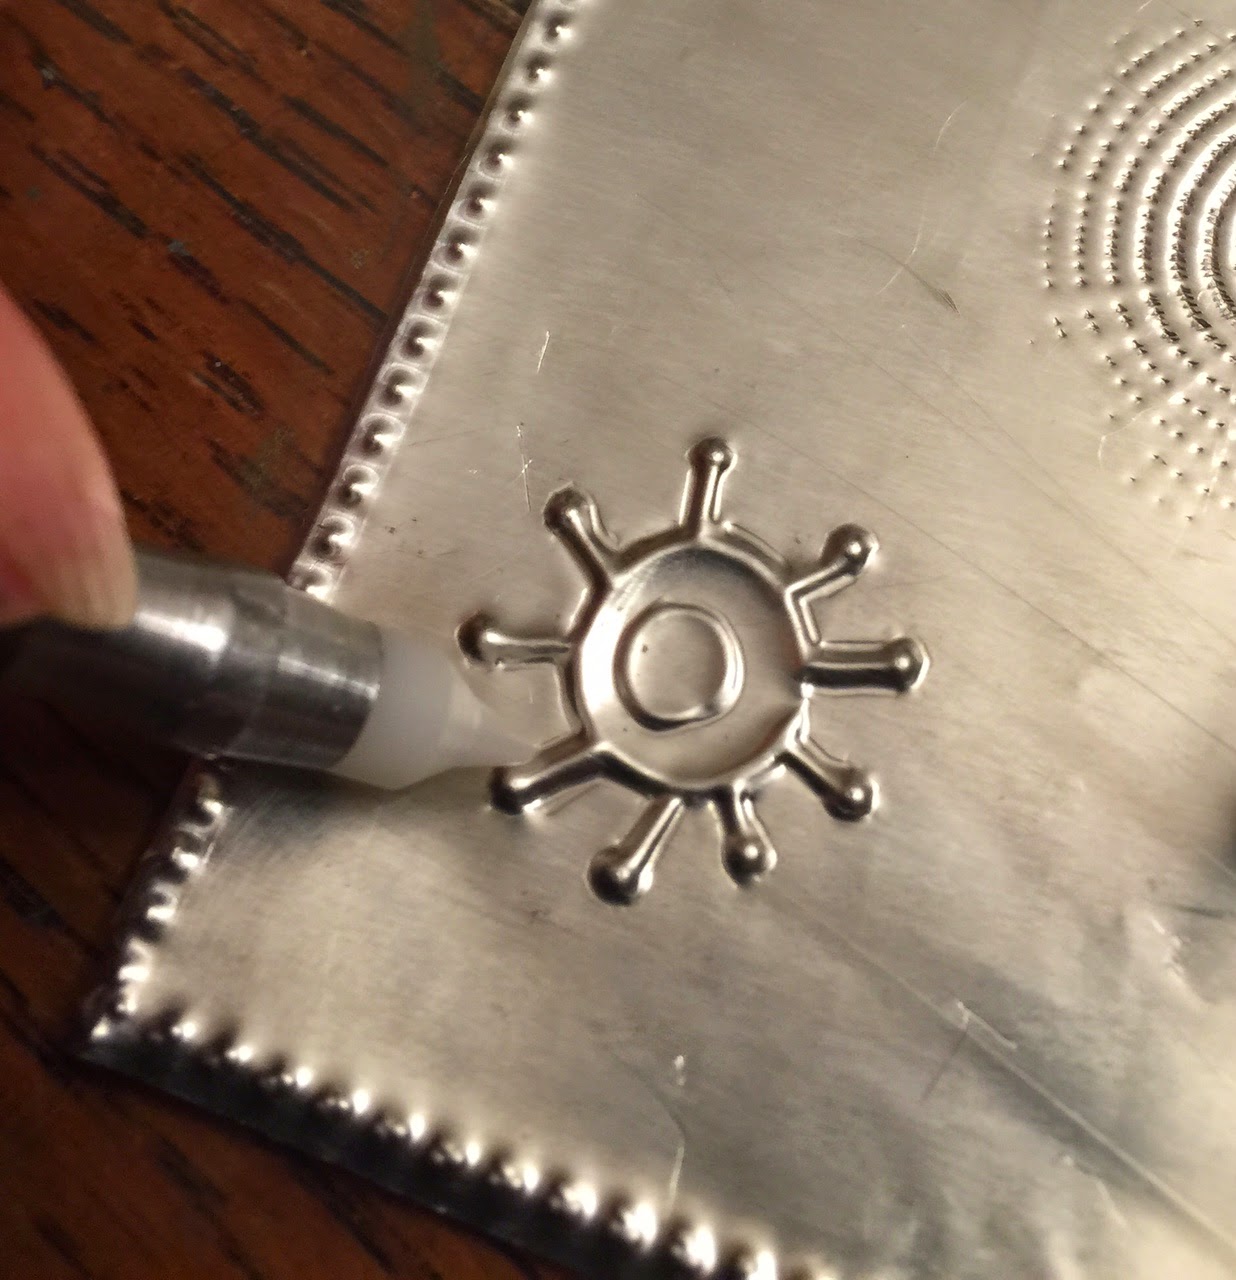
4)Place the suede under the pewter (still working on the back) and trace or draw assorted tangles with the Teflon tip. Use the round sphere of the Cup and Ball to push the metal or emboss certain areas.  Use the decorative wheels (Star Wheel and Big wheel) to add textures and to create a border.
 
step 5
5) Remove the suede and turn the metal to the front. Clean or outline the outer lines of the embossed tangles with the Teflon tip to give it a nice defined look.
 
6) Add a different look to the background metal by rubbing it with the Fiber Glass tool.
 
7) Fill the back of the embossed areas with the Filling Paste and let it dry for a few hours. The dry hard paste will prevent the metal from being  pressed down. The Filling paste is liquid and has an applicator to fill just the embossed areas. It levels itself. It is really hard once it dries (it takes between 1 hour to 8 hours to dry, depending on the size/depth of the area).
 
step 8
8) Apply the Pewter patina with a brush (on the front of the metal). It will turn the pewter black.  Remove the excess with a paper towel after 2 minutes.
 
 
step 9
9)Rub the metal with a silver polishing paste and rub with a soft cloth until you get the desired shine.
The black patina will remain in the crevasses, giving the pewter a nice antique look.


10) At the end, I painted the wooden box with Decoart acrylic paint and I glued my project to the top of the box with Mercart's double sided adhesive.

Visit our Fecebook Page for more ideas!


Thursday, August 28, 2014

Stencils and Aluminum on a Tin Box


I have been doing and teaching Metal Embossing for about 15 years. For years I only did the traditional techniques until I started to incorporate the use of stencils. I was fascinated of how easy and fast it is to do beautiful projects with metal and stencils.

Besides making embossing easier, stencils offer an amazing variety of designs and the freedom to place them on any part of the metal, use just one section of the stencil or use several stencils on the same project. This  for example, cannot be done with the embossing folders that limit, among other things, the size  and position of the project to that of the folder. Embossing Folders  look too perfect or "machine made"; I believe stencils offer a better chance to  make your projects look more personal, beautiful and unique.


These are the main steps to do the tin box cover using 12” x 12” TCW390 Baubles stencil and color aluminum:
 
1)Place the metal on the stencil. Rub with the paper stump until you "see" the  stencil's design


2)Still with the stencil under the metal, outline every part of the design using the pointy part of the double Teflon D-01 tool. This gives the entire design a nice definition.


3)Turn the metal to the back (you will see the silver side of the metal) and on the suede.Use the small Star Wheel of the Basic Kit to add some accents around each shape of the design.


4)      Still on the back of the metal and over the suede, trace any tangle, doodle or design with the pointy Teflon tip.

 
5)      To create more textures or designs, turn the metal to the front and rub against any other stencil or texture plate


6)      On the back of the metal and on suede, roll any decorative wheel such as the Big Wheel to create a frame around your project.


7)      Sand the front of the metal with a sanding block to remove the color from the embossed lines or designs.

 
8)      If you want to add some color or patinas, rub the metal with assorted Gilder’s Paste colors. I used several colors and  the German Silver at the end to add some highlights.


9)      At the back and on the suede, push or emboss the metal on certain areas with the round sphere of the Cup and Ball tool. This will create the “puffy” look on the metal.  You can also use the paper stump to push and soften the metal.


10)   On the front of the metal (no suede) you can use the pointy Teflon tool to outline any shape that you have embossed from the back to give it a nicer definition.


11)   Fill the back of the embossed areas with MercArt’s “Filling Paste” to keep them from being pushed down. This paste is easy to apply because it is liquid and it has an applicator. It levels itself and it  gets really hard once it dries (between 1 to 8 hours depending on the size/depth of the embossed area).


12)   Adhere your metal to the tin box with any strong craft double side tape.


Materials I used:
5 x 7" Tin Box
Sanding Block
MercArt's products:  Grey Aluminum 5" x 7"
                                          Basic Kit with 4 double tools:
(Teflon D-01, Star Wheel, Refiner, Cup and Ball #4)
            Big Wheel
     Suede
                    Paper Stump #4
              Filling Paste
                            Double side adhesive
 Gilder's Paste: German Silver, Copper, Coral Red, Rust, Patina and Bronze
 
Like us on Facebook to see more ideas!


Friday, April 18, 2014

Aluminum:New Colors and New Size!!

We have added new colors to our selection of 9" x 12" aluminum
Yellow, Grey, Purple, Gold, Pastel Blue and Christmas Green.

We also have now a great variety of 5" x 7" colors:
Grey, Navy Blue, Peach, Lilac, Dark Green, Red, Orange and Cream.
Navy Blue, Sky Blue and Pastel Blue

Red, Orange and Peach

Christmas Green and Dark Green

Purple and Lilac

Cream, Gold and Yellow

Black and Grey

We also carry colors not shown here such as: Bronze, Teal and Fuchsia.

The "swirls" on each sample were done using Dreamweaver's Mosaic Swirls LJ901 Stencil 

Wednesday, April 2, 2014

NEW TUTORIAL!
Stencil Girl Products and MercArt

Visit Stencil Girl Products Blog stencilgirltalk.com  and see my tutorial using two of the new designs from Stencil Girl Products: Tribal Hand and Segments.
Follow some simple steps to make easy metal embossing projects using Colored Aluminum, stencils and the new Gilder's Paste patinas.
You will have a beautiful project in just a few minutes.
Products used on the tutorial:
Stencil Girl Products: Tribal Hand S180
Stencil Girl Products: Segments S189
MercArt's BasicMetal Embsossing Kit with 4 tools
MercArt's green colored aluminum
MercArt's Big Wheel, paper stump, suede, Fiber Glass tool and Filling Paste
Sanding Block
Gilder's Paste colors: African Bronze, German Silver, Verdigris and Copper.


See the complete and easy to follow steps here too:


Step 1
23
4)

step 5
6)

7)
8)9)

Steps:
1) Place the aluminum (color side down) over the Tribal Hand S180 stencil and rub against it with the Paper Stump until you clearly see the design.
2)With the Teflon Tool D-01, outline every part of the stencil design to get a crisp definition
3)Place the metal color side up over the background stencil, Segments S189,  and rub with the paper stump until you can see the design clearly. Outline the design with Teflon D-01
4)Place the metal on the back and over the suede and roll the Big Wheel (or any of MercArt's Decorative Wheels) on the edge  of the aluminum to create a border.
5)Remove the color of the embossed areas with a sanding block.
6)With your finger add any Gilder's Paste colors you choose (we have 12 new colors to choose from!). They can be applied on layers to create new tones and interesting patinas.
7)Add dimension and make the metal "puff" by placing the metal on the back over the suede and embossing certain areas with the round sphere of the Cup and Ball #4 and the paper stump.
8)Fill the back of  the embossed or raised areas of your project with MercArt's Filling Paste. As it's liquid, it levels itself and once it dries, it gets really hard, so the shapes remain embossed.
                           I hope this has inspired you  to use stencils and color aluminum in a new way!


Ready in just minutes!


Other projects using Stencil Girl Products Stencils with MercArt color aluminum and Gilder's Paste:
Stencil Girl Products Birds S110, Copper and Gilder's Paste


Stencil Girl Products Circle tiles stencil, Blue Aluminum and Gilder's Pastes

ZIA (Zentangle Inspired Art)
I added Gilder's Paste to both the Navy Blue aluminum and the Wooden Frame
For  the template I used Stencil Girl  Ripples  Stencil S188
All tangles were done free hand with the Teflon D-01


Monday, March 31, 2014


EXCITING NEWS!!

NEW PRODUCT: Gilder's Paste

We are so happy to offer you the Gilder's Paste in 12 gorgeous colors:
Foundry Bronze, African Bronze, Copper, Coral Red, Iris Blue, German Silver, Sandalwood, Patina, Rust, Rich Gold, Verdigris and Slate.
These highly pigmented wax based pastes can give different patinas and tones  to any of your metal embossed projects. They can also be used on  ceramic, wood, gourds, resin and practically any surface!
Apply easily with finger, brush or sponge. They can be overlapped to create even more tones.

Gilders Paste in 12 colors   1.5 oz

Done in Pewter with Copper, African Bronze and Verdigris
Navy Blue aluminum with Stencil Girl Products stencil and assorted Gilder's Paste colors

NEW STENCILS HAVE ARRIVED!

We have new stencils from Stencil Girl Products, The Crafter's Warehouse and Artist Cellar.
Here is just a small selection of the New designs. More will be coming soon, including the new designs of brass stencils  from Dreamweaver

Stencil Girl Products Segments S189
Stencil Girl Products Ripples S188


Stencil Girp Products Tribal Hand S180
     
Stencil Girl Products S163
TCW448 Four Faces
TCW432  Rose Window
TCW450 Art Deco Leaves
ArtistCellar Whimsy Town AC066