Monday, November 28, 2011

Gift Tea Box

Looking for an original gift?  What about this wooden box covered with pewter ?
I was inspired by a heart shaped box done by Kaori Kochi, one of  my students in Japan.

I gave continuity to the ribbon by folding  it over the box in its 4 sides.

The box blue color was given with the new CS207 Blue Velvet  Color Solution alcohol ink by Dreamweaver.


Reminder: Our Anniversary Sale is almost over!
You still have a couple of days to get 20% off in all your online orders  at www.mercartusa.com
Valid until Nov 30,2011.

Tuesday, November 15, 2011

Mexico

I was in Mexico City for some days and, besides enjoying my mom's company, I was able to get some new ideas.
I was also able to visit Mexico City's downton, which is full of historic colonial buildings ( XVI century) and prehispanic (Aztec) sites.
I was lucky to see the huge and amazing exhibition of  "Alebrijes" (mexican folk art;  colorful sculptures of fantastical creatures)  at the "Zocalo" or main downtown plaza.


Cathedral at the "Zocalo" Mexico City. Downtown


This small box was covered in pewter. Most of the design is made of "perfiles" or lines.
You can use the Refiner LT-05 or the Teflon D-01 for that.

Friday, October 28, 2011

JAPAN

I came back this week  from another amazing 12 day trip from Japan. I taught 100 talented artists in 3 cities: Tokyo, Osaka and Fufuoka.
My wonderful hosts and distributor (Athena), plus the JMEA (Japan Metal Embossing Association) team, the translators and the enthusiastic group of students made me feel at home (just like they made me and my mom feel in 2009).
This won the "Mercart" prize
at the 3rd Annual Competition.
Chiko the author is amazing!
During one of the classes in Tokyo
Not all was work. They also took me to Mount Fuji and to Nara, where Japan's capital once was located. I enjoyed the food and delicious pastries and became a big fan of the Udon soup and tempura shrimps.
I'm so looking forward to the next time in Japan!

With the JMEA directors, Hisa my host
and Miki the great translator
It all started with Keiko (with the hat) who took several classes with me in Dallas in 2003/04.
She is now JMEA's president and has hundreds of students.

This is the big pewter clock they did


This was the "dessert"
Done in color aluminum with
Dreamweaver stencil and embossing plates


Monday, October 10, 2011

NYC and Canada

My mother (founder of Mercart in 1970) and Sofia @ Cantral Park
Sorry for not posting anything for a while. This has been a hectic time. After the opening in Mexico City of our new MercArt store (last post), I went to New York City with my family. We went to celebrate Sofia's (my daughter) 16th birtday. She loved Broadway ("Wicked" was so funny), MOMA, Central Park and of course...Times Square at night. As every teen, I guess, she now wants to move to the Big Apple.
One week later I went to Montreal to teach. I had a very talented and nice group of Canadian ladies. Among the 7 projects that I taught, here is one using Pewter,  Laminated shell and the "Dry Point" tool that cuts metal.
Laminated shell looks great in any of the 10+ colors we have

 
Typical stairs in Montreal.  Bonnie my host took me sightseeing beautiful Montreal.


Thursday, September 1, 2011

MercArt's new store!

I was in Mexico City  last week for the Grand Opening of a new MercArt store.  It was a great success and I was thrilled to see so many friends and loyal customers.
It is remarkable that my mom, who founded MercArt in 1970 (yes, 41 years ago!!!) still has the energy, and enthusiasm to open new stores!  At 78 she is indeed an exceptional role model. She is the  most positive, nice, strong and hard working woman I have ever met.
Everybody loved the big screen that shows "how to" videos.


It not only has Metal Embossing products but  many other Fine Crafts
Located in one of the most affluent neighborhoods in Mexico City.

The Quadratus canvas manufactured by Indart, the company that my dad founded more than 50 years ago! 


--------------------------------------------------------------------------------------------------------------

August's Blog giveaway winner is:
Sarah Elizabeth Foley
Please give us your address so we send you one of each of the colored aluminum sheets.
Congratulations Sarah.

Monday, August 8, 2011

Embossing Plates

We used to carry these embossing plates in our main company in Mexico about 13 years ago. As we are opening a new store in Mexico City,  we decided to bring them back.  These are 4 of the 16 designs we have.


You can use these plates to add textures or backgrounds in Metal, Paper,  Polymer and Metal Clay.
These 4 pendants were done in Lead-free pewter using 4 of the 16 Embossing Plates.

See all the designs @ www.mercartusa.com


Saturday, July 30, 2011

Nautilus

This was such a fun, simple and fast project to do.
I used Dreamweaver's stencil Nautilus LS04 and our Texture Plate #14.
MercArt's products used were:
      Teflon D-01
        Paper stump #4
       Teflon D-03
       Cup and Ball #5
       Suede
       Pewter
        Plate #14
        Filling Paste
        Pewter Patina


Texture Plate #14

 
After embossing the nautilus, I placed the pewter on the Texture Plate and rubbed the metal against the plate with the paper stump. I outlined some parts of the design with  Teflon D-01.
I finished it by adding Patina and polishing it (with silver polish paste).
This project will look great as a book or box cover.


HURRY!
Just 2 days left to take advantage of our Summer Sale!
We offer 20% off in ALL your online purchases only twice a year and this one ends on July 31st.
Visit us at www.mercartusa.com


Sunday, July 24, 2011

Wooden Chest in Pewter


I always try to teach the traditional "Repujado" (Metal Embossing)  techniques in my workshops. I believe that knowing the techniques allow you to create a wider variety of projects; from the simplest and easiest using molds or plates, up to very intricate pieces like this wooden chest.

This wooden chest was covered in Pewter. It's  such a malleable and soft metal that you can fold it, bend it and cover most any surface with it. No wonder why it is the "Rolls Royce" of metals.

The main MercArt's tools used were:
*Cup and Ball #2  #4, and #6
*Double Ball
*Teflon D-01
*Refiner LT-05
*Dry Point (to cut)
*Filling Paste
*Pewter Patina
*Suede
*Paper Stump #4
*Laminated Shell
*Pewter


The book pattern was transfered to the metal with the Teflon D-01.
Working at the back of the metal and  on the suede,  I embossed all the "raised" areas with the appropiate size of the Cup and Ball or the Double Ball. The number of the Cup and Ball tools stands for the diameter (in millimeters).
I outlined or cleaned the embossed shapes with the Teflon D-01 or the Refiner (on the front and without the suede).
The Cup and Ball tools were also used to create different sizes of dots.

After adding the Filling Paste on the embossed areas I added Patina to the whole piece and polished the metal until getting the desired shine (any good silver polish works). That is another great thing about pewter: it is the only metal that looks like real silver.
I used the Dry Point tool to cut the little windows on the metal. I did it over glass. 
I cut big pieces of Laminated Shell to fit under the cut out shapes on the metal and glued them to the wooden chest (the shell is self-adhesive). I then glued the metal over the shell and wooden piece.  You can use the  "deer foot" or flat part of Teflon D-01 or the Paper stump to make sure the metal adheres well to the surface.

So yes, Metal Embossing can be used practically anywhere. The more you know the different techniques, the more infinite the possibilities are!


Tuesday, July 12, 2011

Easy Bookmark

I just came back from the CKScrapbook show in Houston, Tx.
We had 2 different "Make-it Take-it" projects to do in our booth. One of them was a Bookmark. 


This Bookmark was done in Pewter and using the Sizzix embossing Machine with a Cuttlebug Embossing Folder.
I am not a huge fan of "machine" made embossing (I feel like cheating somehow) but I must admit it's a fast and easy way of doing some metal projects.
I always add some "hand made" details  to these projects so they don't look so "machine made".
Using the Refiner, I added some details to the circles: dots, lines, squiggles...and I embossed some of them with the appropiate size of Cup and Ball.
At the end I used the Pewter Patina and glued the pewter to the cardboard using double side tape.

People at the booth were able to choose between several Stencils, Backround plates and Embossing Folders. Some even made their "free hand" designs.

Friday, July 1, 2011

Stencil Pewter Frame

This is another project we did in the Chicago workshop.
It was done in Pewter  using Dreamweaver Stencil  LG608.
I decided to turn the design into a frame so I only embossed the outer side of the stencil.


The main MercArt products used were:
*Teflon D-01
*Teflon D-03
*Paper stump
*Pewter
*Pewter Patina


June's Blog Giveaway Winner:
Sandy Davis
Confratulations Sandy!
She will get one of each of our Color Aluminums plus
One Dreamweaver Stencil.
Please confirm your address so we can send you your prize!

Friday, June 17, 2011

Chicago Workshop

I was in Chicago this week teaching an amazing group of ladies formed of teachers, store owners and reps. We had fun working with metals and Stencils, provided by Lynell Harlow of Dreamweaver, who also attended the workshop.

Pewter Necklace


This was one of the projects done in Pewter. We used the background Mosaic stencil LJ901, paper stump, Basic kit and Patina.


These 4 other necklace samples were done with our Embossing Plates for Backgrounds and pewter.

Heart Whimsy

This was the first project (out of 6) the group did.  They used Red Aluminum and Stencils LL599 and  LG628.  I love the contrast between the red plain color and the Dogwood Background stencil.
They used  the following MercArt's products: Basic Kit, paper stump, Screw and Cup Stamping Tool, Fiber Glass, Red Aluminum and suede.  Other items: sanding block to remove the color off the background and main embossed areas.

Thank you ladies for a wonderful workshop. You are a very talented goup of artists!


Monday, June 6, 2011

Mini Books

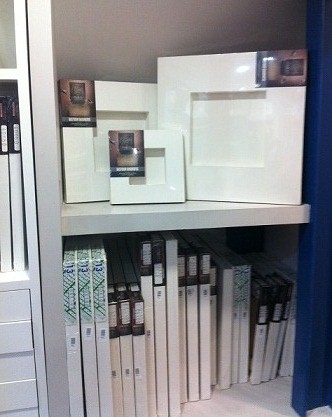
We had a booth at the Great American Scrapbook Convention in Arlington Tx. One of the projects for the Make-it Take-it we had this year were these mini composition books. 
We covered them with colored  aluminum. People were able to choose the color and the stencil (by Dreamweaver and Tessler)they wanted to use as a design.
For backgrounds we also used some of Dreamweaver's stencils and our embossing background plates.


Let me remind you the main steps for working with stencils and color aluminum:
1) Place the stencil on the colored side of the aluminum .
2) Turn the metal and place the stencil and metal over the glass or acrylic.
3) Rub with a paper stump against  the stencil  to "see" the design.
4) Outline the design with the Teflon D-04.
5) Create a border with any of our "Decorative Wheels". Use it on the suede.
6) Turn the metal (to the front/color side) and flatten with the paper stump any bump or wrinkle in the aluminum.
7) Place the metal (color side up) on the embossing plate or the background stencil and rub firmly against it with the paper stump until you  get all the "background" textures on the metal.
8) Remove the color from the embossed areas by sanding the metal (manicure sanding block).
9)Turn the metal and place it on the suede.  Push the metal in the specific areas to be embossed. Use the appropiate size of Cup and Ball to "puff" the metal.
10) Add "Filling paste" to the embossed areas if necessary.
11)It's ready to be glued to any surface, such as the mini composition books shown.


Tuesday, May 31, 2011

Puzzle Sampler


We have been doing samplers like this for at least 15 years. 
 We usually make them tracing squares or rectangles (I recommend using the scor-it for that) for each texture.
This time I decided to use a puzzle shape.  You can use Dreamweaver stencil for that.
This particular sampler was done in pewter and I used the following MercArt's tools:
*Dash wheel
*Herringbone Decorative Wheel
*Points with Gap Decorative Wheel
*Assorted sizes of Cup and Ball
*Squares Decorative Wheel
*4 Needles Tool
*Mini Star Stamping Tool
*Teflon D-01
*Crown Stamping Tool
-----------


June's Special:
Get a 20% discount in all Metal Embossing Tools when placing your online orders at www.mercartusa.com

-------------

May's Blog Winner!
Congratulations to Crafts' Paradise for winning this month's giveaway!
Please give us you address to send you your prize:
1 Teflon D-01
3 Sheets of colored aluminum
1 Sheet of Pewter
1 Paper stump


Sunday, May 15, 2011

Candle

This candle was covered with Pewter.
The scrolls were done with the Cup and Ball #6 and outlined or cleaned with  the Teflon D-01.The lines and textures in the scrolls or leaves were done with the Refiner.
The border was done using Decorative Wheel Horizontal. The background was done with the Refiner by scratching lines/squiggles on the metal.
I added Pewter Patina to give it an antique look.  I filled the back of the embossed areas with the Filling Paste.

Tip: To make sure that Pewter adheres to the candle (wax can be tricky sometimes) and besides the regular rubber cement or double side tape you use, place some tiny pins or nails at the union of the metal.Due to their silver color, they will be easily camouflaged.


Remember May's Special:
20% off in all Colored Aluminum 9" x 12" sheets
  www.mercartusa.com
Valid until May 31,2011.

Thursday, May 5, 2011

Moon and Sun

I just came back from a wonderful weekend retreat in Virginia where I had a great time teaching. My students were awesome!! A very talented and nice group of ladies.
This is one of the projects they did in Pewter. The design is a stamp from Judikins.


The MercArt tools used were:
*Star Wheel to create the "fan" look design of the Moon.
*Brass Brush (or Fiber Glass Tool) to get the burnished look of the background.
*Two different Decorative Wheels for the outside frame. In my case I used the Squares Wheel and the Diagonal with Gap wheel.
*Big Wheel to create the row of dots around the sun rays.
*Teflon D-01: To trace the design and outline the embossed areas.
*Stylus: To add the swirls of the sun.
*Cup and Ball #4 and #6:To emboss the rays,  moon & sun.
*Patina: to antique the pewter.

April's Giveaway Winner:
Karen Ellis!
Congratulations Karen.
PLease contact us so we can send you your prize containing:
Wooden Bracelet + Lead-Free Pewter + Basic Kit with 4 tools + Suede

Wednesday, April 27, 2011

LOVE

I found these acrylic letters in my studio and I thought they would look great with some Color Aluminum.
For letter "L" I used Red Aluminum and Dreamweaver Stencil LL599 Heart Whimsy.The background was done using Stencil LJ901 Mosaic Swirls.
Letters "O" and "E" were done in Navy Blue Aluminum and our Embossing Background Plates #07 and #08
Letter "V" was done using Stancils LG628 Dogwood Background and LJ863 Swirls Background.
Background color was removed with a sanding block.  I used the Fiber Glass tool to remove the red color in the Heart design details.
I used our Adhesive roll to adhere the metal to the acrylic letters.

Wednesday, April 20, 2011

Mini Book

The embossed part of this project took me just a few minutes.  I used one of Tessler Stencils. It was done in Pewter.
The tiny dots in the background were done with the Cup and Ball #1.
The textures and lines of the leaves were done with the Refiner.
The center of the flowers were done with the Cup and Ball #4.  I also used that tool to emboss the petals.
All shapes were outlined or clean with Teflon-D01.
I added Pewter Patina to give an antique look to the Pewter and polished it with a silver polishing paste.

Such a mini project can make any regular book look spectacular!

Wednesday, April 13, 2011

Lizard

I had so much fun doing this little project. I love how different the lizard looks using "Brown Latte" aluminum and Pewter.
I used Dreamweaver's Lizard Stencil LM2004
In both cases I used a Fiskars embossing plate as a background.

The border in the pewter project was done using the Big Wheel tool. I also used the Screw and Cup Stamping Tool for adding the 2 screw looking details.
The border in the aluminum lizard was done with the Dash Wheel.  In both cases I used the Teflon D-01 to refine and outline the embossed shapes. I used the Double Ball and the Paper Stump #4 to give the final "puff" to the lizard.
I filled the back of the embossed areas with Mercart Filling Paste and let it dry (it takes from 15 minutes to several hours, depending on the size and depth of the area).
I removed the brown color with a sanding block and the Fiber Glass tool to show the "silver" color of the aluminum. 
 In case of the pewter, I added Pewter Patina to give it an antique look.


Stencils are the easiest way of doing Metal Embossing for easy fast projects. And there are hundreds of designs to choose from !

Wednesday, April 6, 2011

Starter Kit

If you want a complete, yet basic kit with everything  needed to get started doing Metal Embossing we now have the STARTER KIT.
If you buy each item of the set individually you will pay $64.15.  As a set, you now buy it for only $51.00 in our website:  http://www.mercartusa.com/_product_88382/STARTER_KIT
This means 20% off the regular price!


The STARTER KIT includes:
* Basic Kit with 4 double tools
*Cup and Ball #6
*Decorative Wheel Horizontal
*Paper stump #4
*Suede
*Adhesive roll
*MercArt Filling Paste
*Metal Combo Set with 2 sheets of each metal: Pewter, Aluminum and Copper (6" x 6")

Saturday, April 2, 2011

March's Giveaway

March Blog's Giveaway:
This month's winner was:

Linda Carlson
Congratulations Linda!!!
Please contact us to give us your address so we can send you your prize:
5 Sheets of  Assorted Color Aluminums + 1 New "plastic stump" + Suede + Dreamweaver's Stencil


April's Special:
20% off in all STAMPING TOOLS at www.mercartusa.com
Valid until April 30,2011.

Saturday, March 26, 2011

Icon

I just came back from a 3 day trip to Mexico, where I had some meetings with my mom, founder of MercArt Mexico. I'm always impressed by the amazing technique quality of our staff of teachers there and by the huge size of some of their projects!!  I'll try to post some of them soon.


In the meantime, this is one of my favorite Icons (actually it has been part of my website's  "Home" page since the beginning).
Icons and Metal Embossing have been linked for ages. You can find Icons from past centuries done like the sample shown here.  Most of the time,  faces and hands were painted on canvas or wood while the rest was covered with Embosed Metal.
This particular piece was done in Pewter.  The Madonna and Child were painted on wood with the traditional Tempera technique. The background was covered with Gold Leaf (Gilding).


Remember:
20% off in all PEWTER sheets and rolls ONLY until March 31st.


Thursday, March 17, 2011

Spring is Here!

We had a milder winter in Dallas this year. However, some weeks ago we had record low freezing temperatures that  lasted several days, which is not what you would expect in Texas ( it's true then when they say that "If you don't like Texas weather, wait a minute").
One of the things I enjoy the most during this month is the clear change of seasons. My home street, shown here, has these beautiful trees that grow thousands of white flowers before becoming green. I love this annual spectacle.


MARCH SPECIAL!
Don't forget that this month's special offer is
20% off in all sizes of PEWTER!!!!
valid until March 31 at http://www.mercartusa.com/


Sunday, March 13, 2011

Japan

We are sad and concerned  about our friends, teachers, customers and Distributor in Japan for last week's earthquake and tsunami.
I had the opportunity to teach in Japan 2 years ago as well as being part of the jury of the "First National Metal Embossing Competition" organized by our Distributor and JMEA (Japan Metal Embossing Association) .  
 I got to know not only beautiful places, but incredible people. My mom and I were treated like royalty and they certainly made us feel at home.  I'll never forget those 12 amazing days.
I was amazed by the quality of work and dedication of my students and by their gratitude and willingness to learn all the traditional "Repujado" (Metal Embossing) techniques. 

This is just one example of the huge variety of things in which Japanese ladies use Metal Embossing (she came wearing this before taking my class!)

Wednesday, March 9, 2011

Now in Pewter

The same Flowers Frame we did in Colored Aluminum was actually  first done in Pewter.
The outline of each petal was done with the Teflon D-01.
Remember you can use a  punch to do each flower...yes we are a bit crazy for doing and cutting each one by hand! 

Monday, March 7, 2011

Aluminum Flowers Frame: Thinking outside the box

What about covering a frame with dozens of flowers ?  We did so using 3 of MercArt's colored aluminum: Mustard, Navy Blue and Red.
We traced, embossed the outline and cut each one of the flowers using the Dry Point cutter. However, this can also be done using a flower shape punch (or any other shape for that matter!).
For each flower's center we  used the Betun Judea  (golden patina) .  You can also use "Metal Paint" by DecoArt or  "Pinata" alcohol Inks by Jacquard.

Who said you can only do "traditional" projects? Metal Embossing has endless possibilities.

Tuesday, March 1, 2011

NEW Dreamweaver Stencils

We are glad to inform you that we now carry Dreamweaver Stencils.  Stencils are the easiest and fastest way of doing Metal Embossing.  They are ideal for cards, embellishments and any small and easy to do project!


Stencils can be used with any metal, but Colored Aluminum seems to be the perfect match. In this case I used  Standing Angel LL578 stencil  and  MercArt's Navy Blue Aluminum plus the following:
*Teflon D-01 or D-04
*Dash Wheel (texture in the skirt)
*Crown Stamping Tool (3 flower petals)
*Cup and Ball #2 (flower's centers and wing's dots)
*Small Star with Center Stamping Tool  (5 small skirt's stars)
*Refiner (wing's textures)
*Diagonal Decorative Wheel (upper robe texture)
*Regular and Medium Star Stamping Tool  (stars in the sky)
*Big Wheel (border dots)
*Paper Stump #4
*The cloud texture was given with the LJ863 Swirls Stencil.  Just rub with a paper stump the front of the aluminum against the stencil to get the texture.
When you finish,  remove the color with a (manicure)sanding block. Use the Fiber Glass Tool or the Brass Brush to remove it in small or detailed areas, just as I did in the Angel's face, hair and part of her robe.

FIRST MONTHLY GIVEAWAY WINNER!!
Patrice Sigmon was February's Giveaway winner!
We will send her a Combo Set of Metals 6" x 6" with 2 sheets of each: Pewter, Copper and Aluminum and
One Basic Kit with 4 Double Tools

Patrice please send us your address so we can mail you this price asap!

Saturday, February 26, 2011

Fish Rubber Stamp

Rubber Stamps are another source of designs for your projects.I did this in Pewter based on a Magenta stamp.  You can  use washable ink and stamp it directly on the metal. Then you will trace the main outline with the stylus or Teflon tool and wipe out the ink. (You  can also stamp the design on paper and trace it with the stylus on the metal). You can use decorative scissors to cut the metal.
MercArt's tools I used were: *Teflon D-01 or Teflon D-04
*Cup and Ball #1 (eyes and tiny dots)
*Paper Stump #4
*Big Wheel (border dots)
*Refiner (for the background squiggles)
* 4 Needles Tool (fin's textures)
*Micro Wheel (head's texture)
*Assorted Decorative Wheels: Dash Wheel, Points with gap and Diagonal.
*Pewter
*Patina
*Suede
*Filling Paste

Tuesday, February 22, 2011

Monogram in Pewter

I love doing monograms or initials on metal. It is also a great way of personalizing a gift. Pewter gives it the extra touch of elegance.

In this project I used the following MercArt's products:
*Teflon D-04
*Cup and Ball #3
*Paper stump #4
*Screw and Cup Stamping Tool (for the corners)
*Big Wheel (row of dots around the monogram and as a border).
*Fiber Glass tool (burnished look in the background)
*Filling paste
*Pewter Patina
*Pewter

Saturday, February 19, 2011

Aztec design

These 2 projects were inspired by a thousand years old aztec design. One was glued to a plastic light switch plate (with double side tape) and the other to a tin box.  They were both done in Pewter..  Main tools used:
*Teflon D-01 or D-04      *Refiner        *Paper stump      *Double Ball
*4 Needles (for the basket weave effect in the background)
*Stamping tool "Small star with center"  for the background
*Dash wheel for the fan effect in the main circle.
After it was finished I put Filling Paste at the back of the embossed areas and added the pewter Patina.